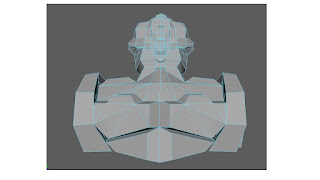
This was the model sheet I made, with topology lines, so I was able to go over this in side, front and perspective views in Maya to closely create a 3D version of this initial mood board.
After the initial mood board and model sheet of my mock statue that I made, I then took the images into MAYA and used the method I used for the first head to create my own statue. The process was great and I have learnt many new techniques in maya, so of which I can use to improve old work such as using vector merging for cleaner results, for the battle arena.
The first step was the half face section. I completed the whole side of the face. Once done, I then mirrored the mesh and connected the middle section. This was much easier that trying to copy wat you have all ready done.
I then extruded done and over the template I created so I could create the rest of the body. As I worked down, I adjusted the back to how I wanted it, this way I could follow the curved back.
I continued the mirroring process throughout the model all way down. This way it kept its symmetry.
Once I had done all the mirroring to the body, I added some extruded details and removed some of the inside faces. I am very pleased with how the statue turned out as looked a lot like my initial designs/ideas and fits well with the theme of the battle arena, which was the cold war inspired sci fi robot.
When texturing I will use a worn dark to mid grey tone texture with some weathering and broken parts, which I will paint and create in Photoshop. As for the position I will have the arms come down and in like the original statue but with more curve to the arm.


No comments:
Post a Comment